Maintain Scales from Houdini to Other Softwares
by Clark Cheng
Working with Real-World Scale in Houdini
In mesh-based modeling workflows, scale is one of the most important yet often overlooked elements—especially when moving between digital and real-world applications. In HoudiniFX, the software’s procedural nature offers a powerful modeling environment, but maintaining real-world scale presents some unique challenges.
I’ve used Houdini across a variety of tasks, from VFX modeling to preparing assets for real-world fabrication. While Houdini is extremely flexible, this flexibility also means that scale management becomes the responsibility of the artist. Some nodes and operations behave differently depending on the scale of the geometry, and it’s easy to lose track of how transformations accumulate throughout a network.
Challenges with Scale in Houdini
- Tool Sensitivity: Many SOPs are optimized for geometry within a specific size range. Very small or very large inputs may produce unstable or unexpected results.
- Viewport Display: Working with tiny or enormous geometry can result in display clipping, poor zoom behavior, or precision issues in the viewport.
- Export Inconsistencies: Assets may appear at incorrect sizes in other software if Houdini’s unit scale isn’t accounted for during export.
- Simulation Accuracy: Simulation parameters are heavily dependent on scale. Forces like gravity, friction, and collision thickness must be adjusted manually if working at non-standard scales.
My Workflow for Maintaining Real-World Scale
- Import: I import my model into HoudiniFX using formats like OBJ, FBX, or USD, depending on the source pipeline.
- Transform to Working Scale: I scale or reposition the model into a range that works well
with Houdini’s operators. Most of the time, I use the
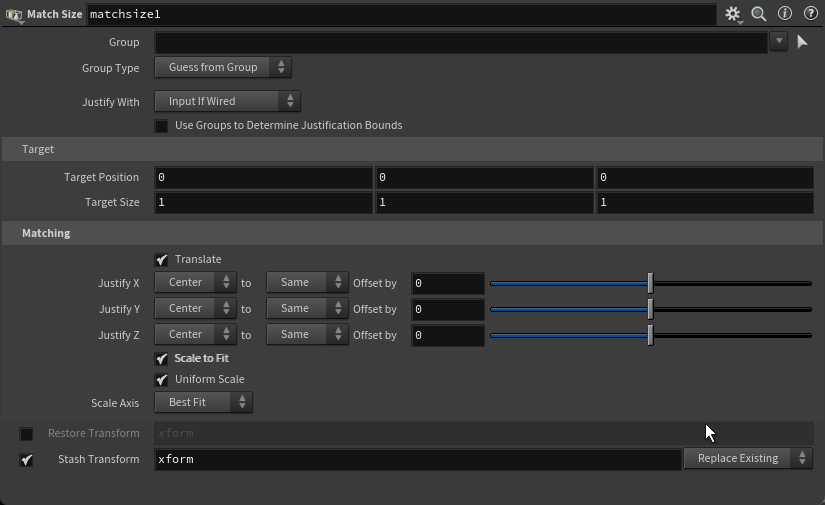
MatchSizeSOP to normalize the geometry for editing or simulations. - Edit: I perform all required mesh operations—adding detail, cleaning topology, remeshing,
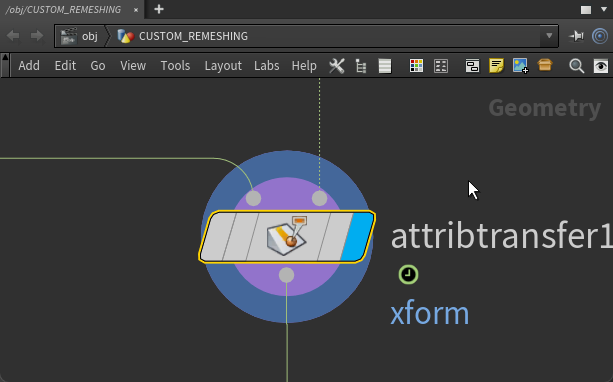
or procedural deformations—within this transformed space. Make sure you maintain the xform detail attribute
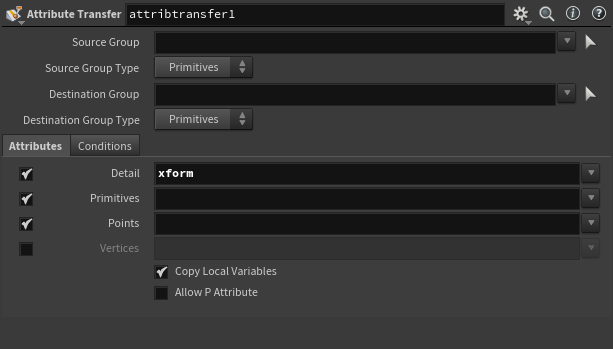
in your files. If not, you can always just add it back with a
AttributeTransferSOP. - Restore Original Transform: I use the xform output from the original
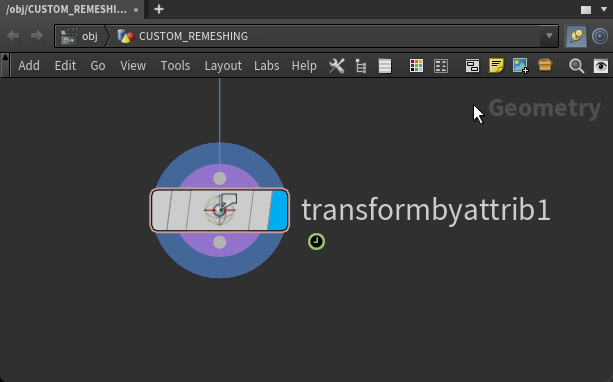
MatchSizeSOP orTransformSOP, with theTransformbyAttributeSOP. - Export: The final result is returned to its original real-world scale and position, preserving spatial accuracy while reflecting all the design changes made.
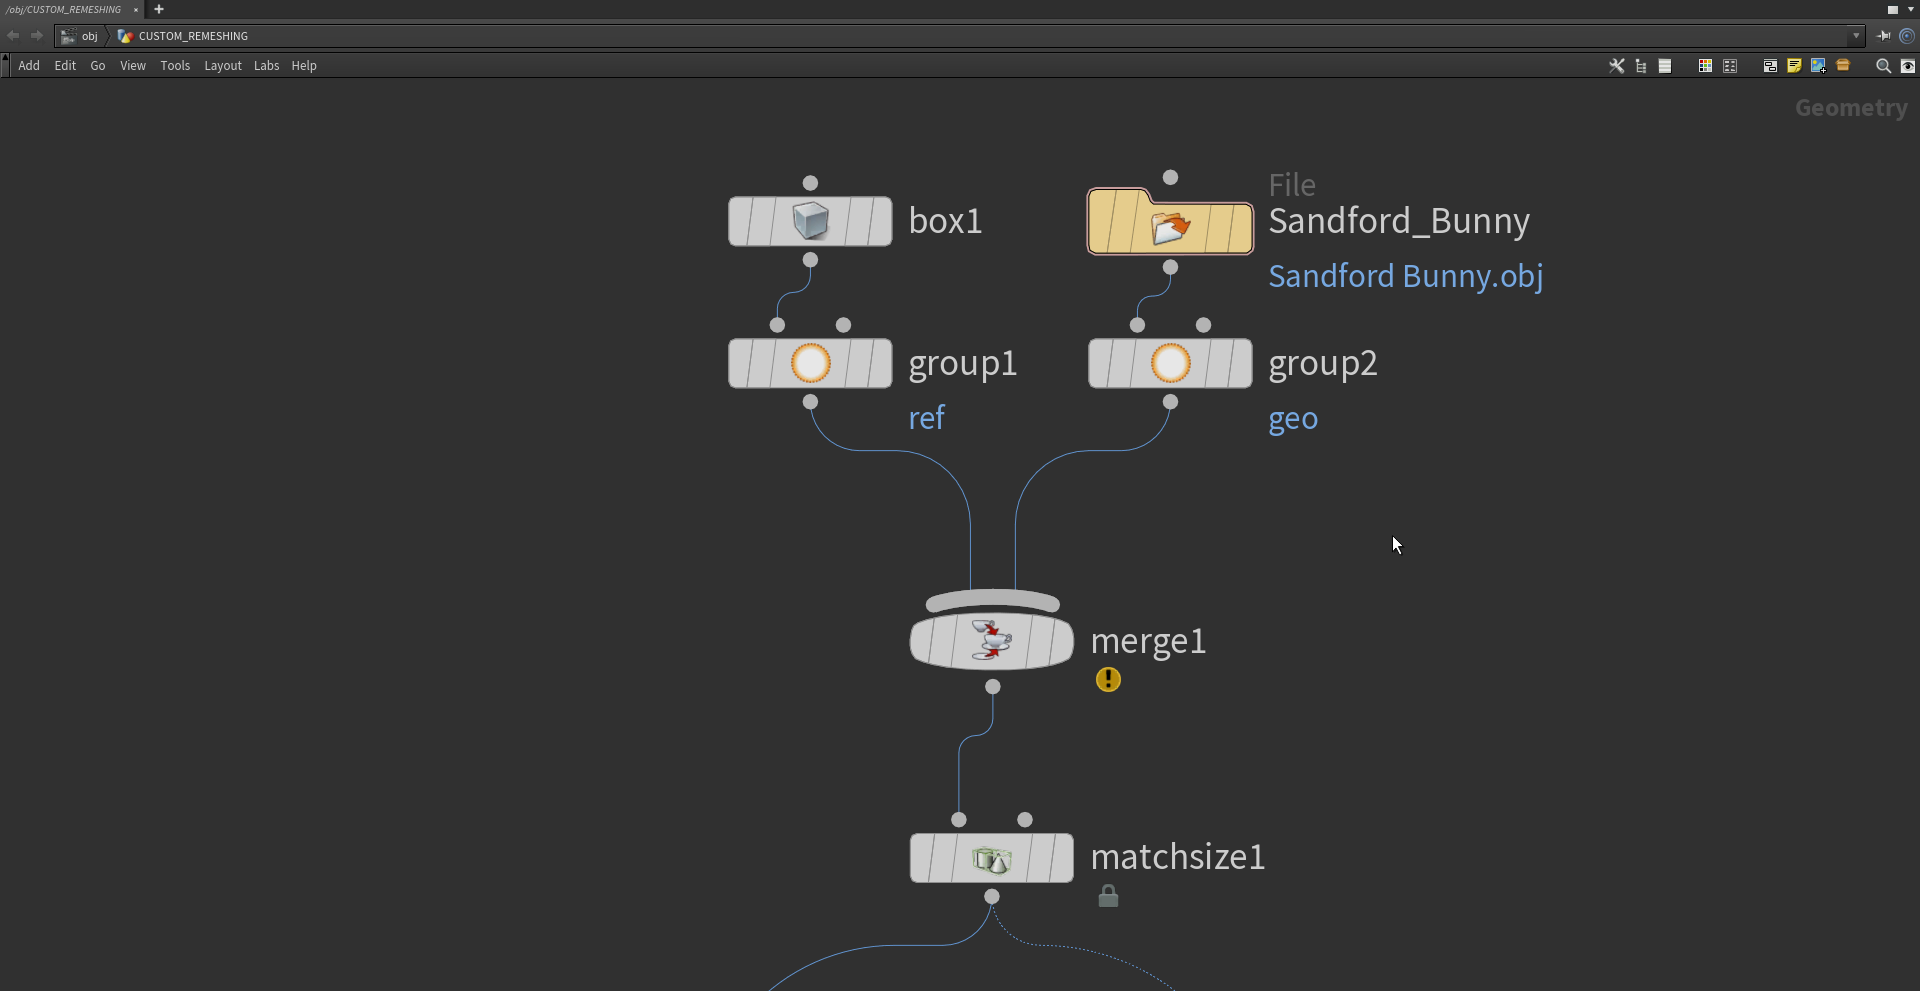
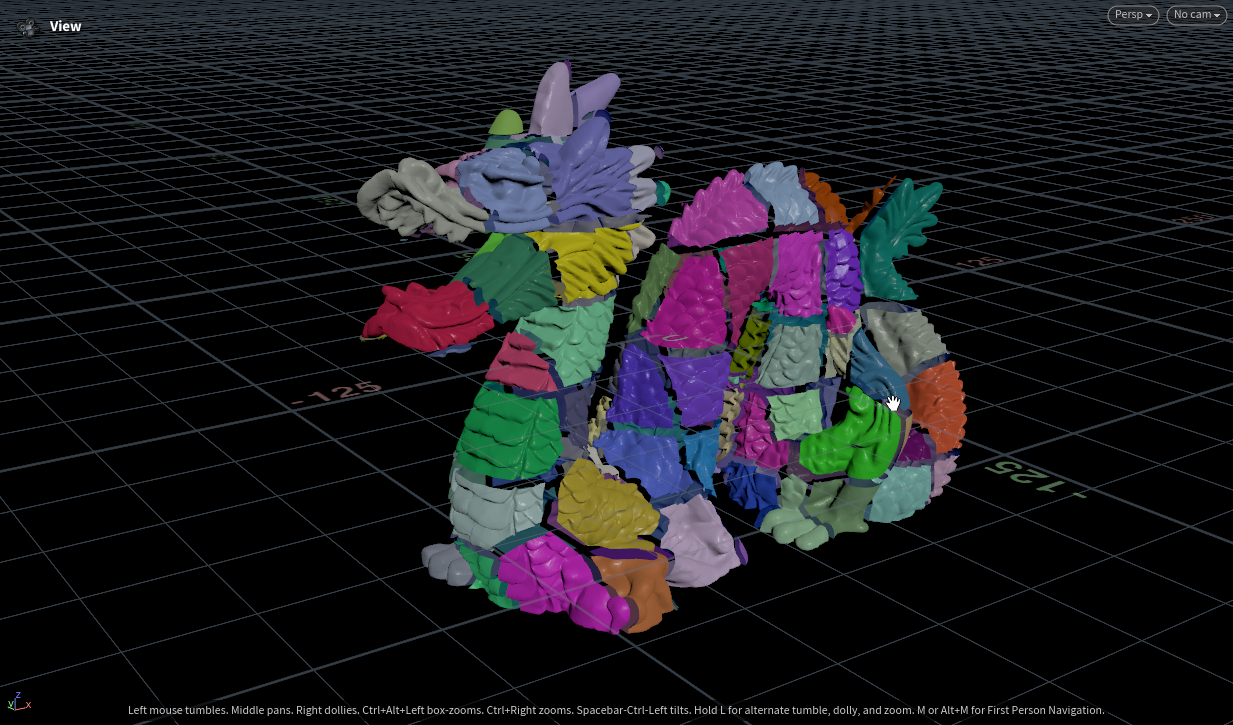
Example File, using Sanford Dragon
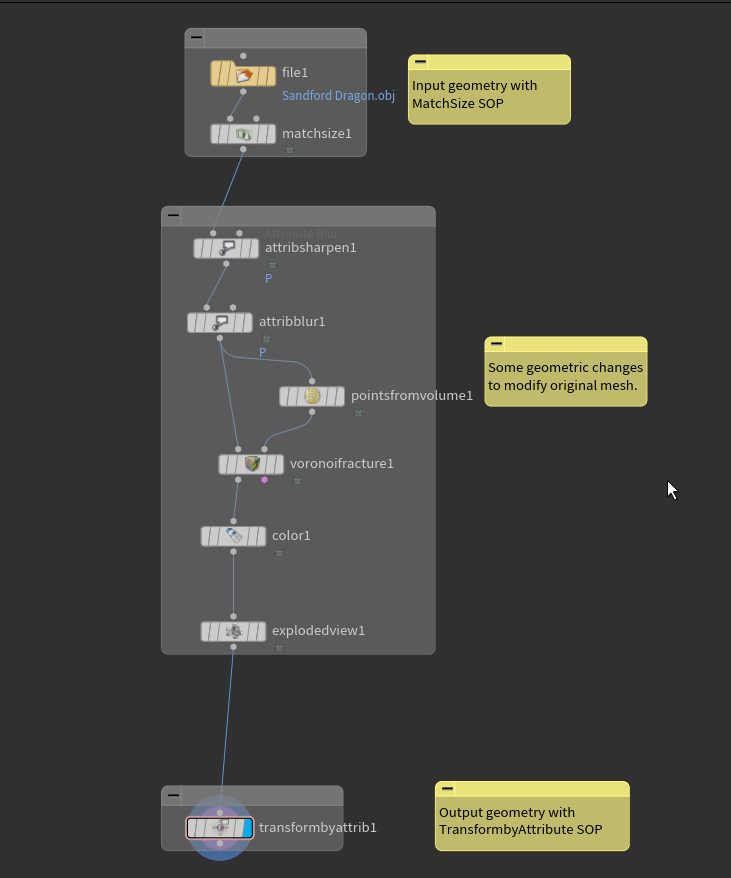
Here is a file example of using the Sanford Dragon model as reference.
Network view of the overall logic in Houdini. This setup shows the procedural steps taken to transform, edit, and restore geometry while preserving real-world scale.
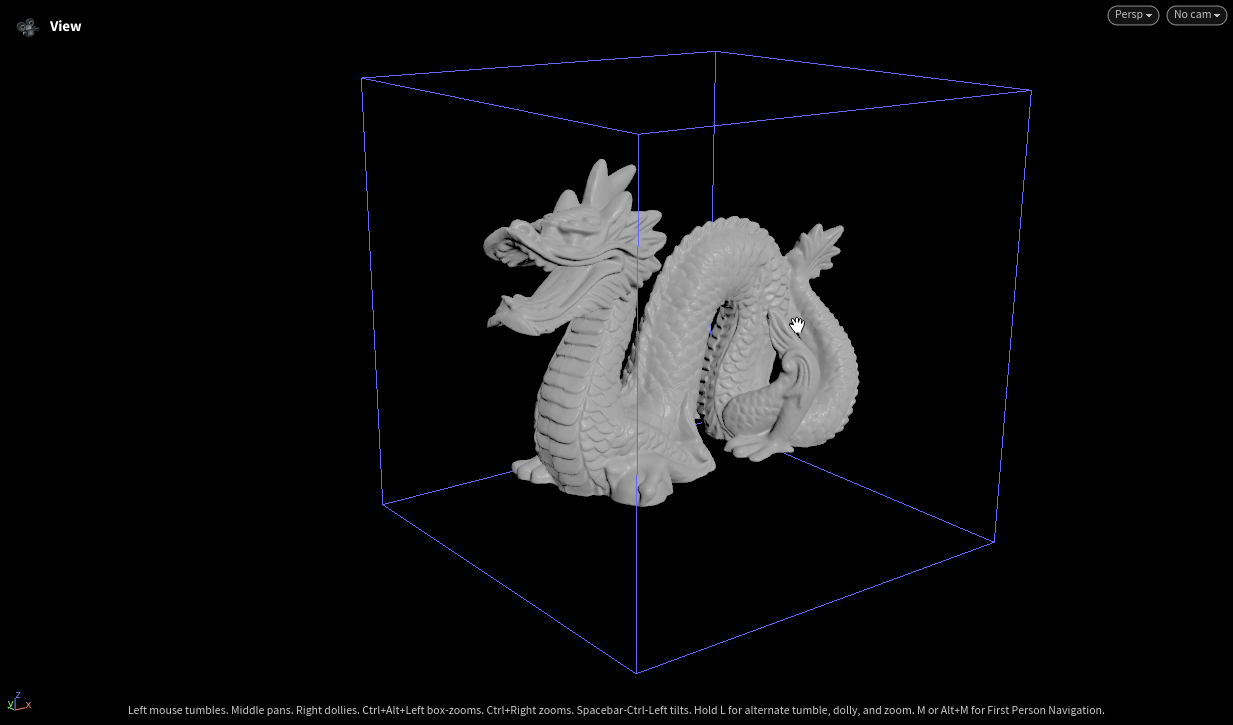
Geometry after applying the MatchSize SOP to normalize scale and reposition the model into a working range for editing.
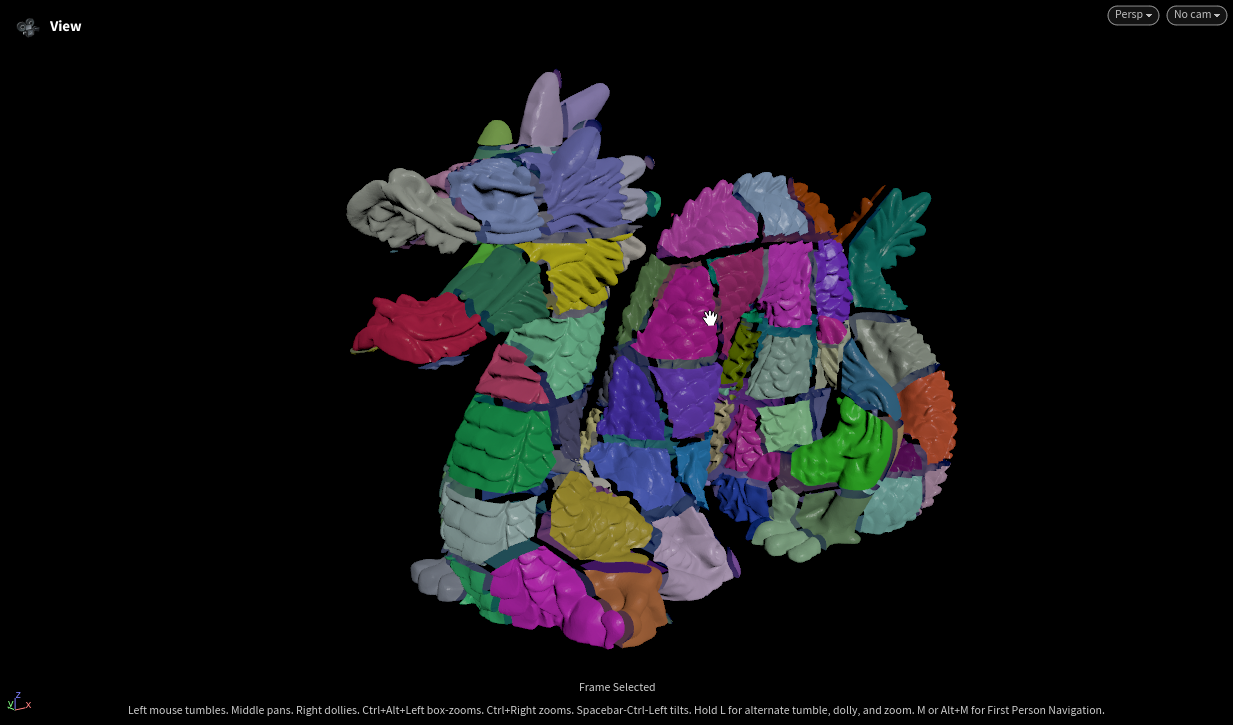
Geometry mid-edit, showing operations such as splitting, smoothing, and sharpening. These edits are performed in normalized space for optimal control.
Final geometry after applying transformations to return it to its original world-space position and scale, with all modifications preserved.
This workflow allows me to operate comfortably inside Houdini while ensuring that the final assets remain consistent with real-world dimensions. It bridges the procedural flexibility of Houdini with the precision required in fabrication, architecture, and technical pipelines.